Setting up a LAMP stack (Linux, Apache, MySQL, PHP) is essential for deploying dynamic web applications. In this guide, you’ll learn how to install and configure a LAMP stack on an Ubuntu 22.04 server hosted on Oracle Cloud Infrastructure (OCI). This tutorial is ideal for beginners and experienced developers alike.
✅ What You’ll Need:
- Oracle Cloud account
- SSH key pair
- Basic command-line knowledge
Step 1: Create Ubuntu 22.04 Instance on Oracle Cloud
- Log in to Oracle Cloud Console.
- Navigate to: Compute > Instances > Create Instance
- Choose Ubuntu 22.04 as your OS image.
- Configure networking, add your public SSH key, and launch the instance.
Step 2: Connect via SSH
Use the command below from your terminal:
ssh -i /path/to/private-key.pem ubuntu@<your-server-ip>
Replace your actual key path and server IP.
Step 3: Update Your Server
It’s important to update the package lists and install security patches.
sudo apt update && sudo apt upgrade -yStep 4: Install Apache Web Server
Apache is the most popular web server in the world.
sudo apt install apache2 -y
sudo systemctl enable apache2
sudo systemctl start apache2
To verify Apache is running, open your server’s IP in the browser:
http://<your-server-ip>Step 5: Open Firewall for Apache
#Open port 80 for incoming traffic by running the following command:
sudo ufw allow 80/tcp#Update firewall settings.
sudo iptables -I INPUT 6 -m state --state NEW -p tcp --dport 80 -j ACCEPT
sudo netfilter-persistent save
sudo service apache2 restart
Allow HTTP traffic through UFW:
sudo ufw allow 'Apache'
sudo ufw enable
Step 6: Install MySQL Server
During the installation, you’ll be prompted to set the root password for MySQL. Choose a strong password and remember it.
sudo apt-get install mysql-server#Once MySQL is installed, start the service and enable it to start at boot time by running the following commands:
sudo systemctl start mysql
sudo systemctl enable mysql
#This is an optional step and will allow the root MySQL user to login through phpMyAdmin.
sudo mysql#Change authentication method for the root account to mysql_native_password by executing the following query.
ALTER USER 'root'@'localhost' IDENTIFIED WITH 'mysql_native_password' BY 'password';Replace password by the root password you entered while installing MySQL.
#To put the changes into effect, execute the following query :
FLUSH PRIVILEGES;Following this, we can now do a root login through phpMyAdmin. The username is root and password is the one that was setup earlier while installing MySQL.
#Return back to the command line.
exitTo install MySQL and secure it:
sudo mysql_secure_installation- In the next screen we will be asked whether we need to setup VALIDATE PASSWORD plugin. We selected no.
- Set the password for the root MySql account.
- Remove anonymous users? We selected yes.
- Disallow root login remotely? We selected no.
- Remove test database and access to it? We chose yes.
- Reload privilege tables now? We again chose yes.
This will prompt you to configure some basic security settings for MySQL.
Step 7: Install PHP and Extensions
Install PHP along with commonly used modules:
sudo apt install php libapache2-mod-php php-mysql php-cli php-curl php-gd php-mbstring php-xml php-zip php-soap php-intl php-bcmath -y
Then restart Apache:
sudo systemctl restart apache2To check your PHP version:
php -vStep 8: Test PHP Functionality
Test your LAMP installation by creating a PHP file with the following code:
<?php
phpinfo();
?>
Save the file as info.php and copy it to the Apache web server’s root directory /var/www/html/.
Open a web browser and navigate to http://your-server-ip-address/info.php. You should see a page displaying PHP information. If you see the PHP information, your LAMP installation is working correctly.
or
Create a phpinfo() test page:
echo "<?php phpinfo(); ?>" | sudo tee /var/www/html/info.php
Visit the file in a browser:
http://<your-server-ip>/info.php
Once confirmed, remove the file:
sudo rm /var/www/html/info.php
That’s it! You have now successfully installed LAMP on your Oracle Cloud Ubuntu 22.04 server.
(Optional) If you want to install additional PHP modules, you can do so by running the following command:
sudo apt-get install php-{module-name}Replace {module-name} with the name of the module you want to install. For example, to install the gd module, run the following command:
sudo apt-get install php-gdTo manage your MySQL databases and users, you can use the MySQL command line tool or a graphical user interface such as phpMyAdmin. To install phpMyAdmin, run the command:
sudo apt-get install phpmyadminDuring the installation, you’ll be prompted to configure some basic settings for phpMyAdmin, such as the web server to use and the database administrator password. Once installed, you can access phpMyAdmin by navigating to http://your_server_ip/phpmyadmin in a web browser.
Finally, to keep your LAMP stack up-to-date and secure, you should regularly update your Ubuntu packages and LAMP components using the following commands
sudo apt-get update
sudo apt-get upgrade
sudo apt-get autoremove
You should also configure a firewall to restrict incoming traffic to your server and set up backups to protect your data in case of a disaster.
That’s it! You now have a fully functional LAMP stack running on your Oracle Cloud Ubuntu server.
Note:
To be able to upload files using FileZilla we need to change the ownership and access modes of the server directory
sudo apt install zip unzipany file unzip projectname.zip
unzip projectname.zipWhen php file not then follow this process
Set File Permissions and Document Root
sudo nano /etc/apache2/apache2.conf
sudo a2enmod rewrite
sudo service apache2 restart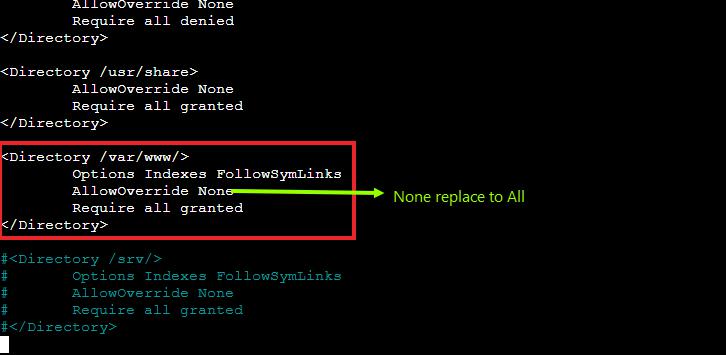
sudo mkdir /var/www/mywebcode.com
sudo nano /var/www/mywebcode.com/index.html
<html>
<head>
<title>mywebcode.com</title>
</head>
<body>
<h1>Welcome to www.mywebcode.com website</h1>
</body>
</html>Step 9: Set File Permissions and Document Root
sudo chown -R ubuntu /var/www/mywebcode.com
sudo chmod -R 755 /var/www/mywebcode.com
sudo chown -R www-data:www-data /var/www/mywebcode.com
sudo chown www-data:www-data -R /var/www/mywebcode.com
sudo nano /etc/apache2/sites-available/mywebcode.com.conf<VirtualHost *:80>
ServerAdmin webmaster@mywebcode.com
ServerName mywebcode.com
ServerAlias www.mywebcode.com
DocumentRoot /var/www/mywebcode.com
<Directory /var/www/mywebcode.com/>
AllowOverride All
Require all granted
Allow from all
</Directory>
ErrorLog ${APACHE_LOG_DIR}/error.log
CustomLog ${APACHE_LOG_DIR}/access.log combined
</VirtualHost>sudo a2enmod rewrite.htaccess
<IfModule mod_rewrite.c>

    Options +FollowSymLinks
    RewriteEngine on

    # Send request via index.php
    RewriteCond %{REQUEST_FILENAME} !-f
    RewriteCond %{REQUEST_FILENAME} !-d
    RewriteRule ^(.*)$ index.php/$1 [L]

</IfModule>
sudo a2ensite mywebcode.com.conf
sudo service apache2 restartStep 10: Add SSL Certificate in Oracle
sudo iptables -I INPUT 6 -m state --state NEW -p tcp --dport 443 -j ACCEPT
sudo netfilter-persistent save
sudo iptables -I INPUT 6 -m state --state NEW -p tcp --dport 80 -j ACCEPT
sudo netfilter-persistent save
sudo service apache2 restart
sudo iptables -save >/etc/iptables/rules.v4
sudo apt install certbot
sudo mkdir /var/www/mywebcode.com/.well-known
sudo chown -R ubuntu /var/www/mywebcode.com
sudo charp www-data/var/www/mywebcode.com
sudo chmod g+s /var/www/mywebcode.com
sudo apt install certbot python3-certbot-apache
sudo certbot --apache
Step 11: Increase SQL File Import Size in PhpMyAdmin
Edit the php.ini file:
php -v
sudo nano /etc/php/8.3/apache2/php.ini
Replace 8.3 with your PHP version if different.)
upload_max_filesize = 100M
post_max_size = 100M
max_execution_time = 300
Adjust the sizes (100M, 300) as per your needs.
Save the file and restart Apache:
sudo systemctl restart apache2


